Anaconda installation and the necessary tools
In this example we are gong to install Anaconda, please click here.
Anaconda is a free and open-source distribution of the in our example Python programming languages for scientific computing (data science, machine learning applications, large-scale data processing, etc.), that aims to simplify package management and deployment. The Anaconda distribution includes data-science packages suitable for Windows, Linux, and MacOS.
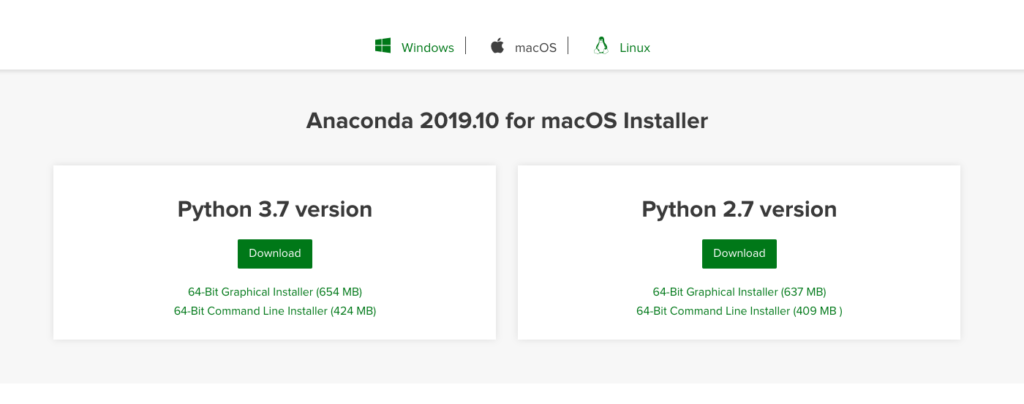
Select whether you have Windows, macOS, or Linux and download Python 3.7 or the latest version that is available.
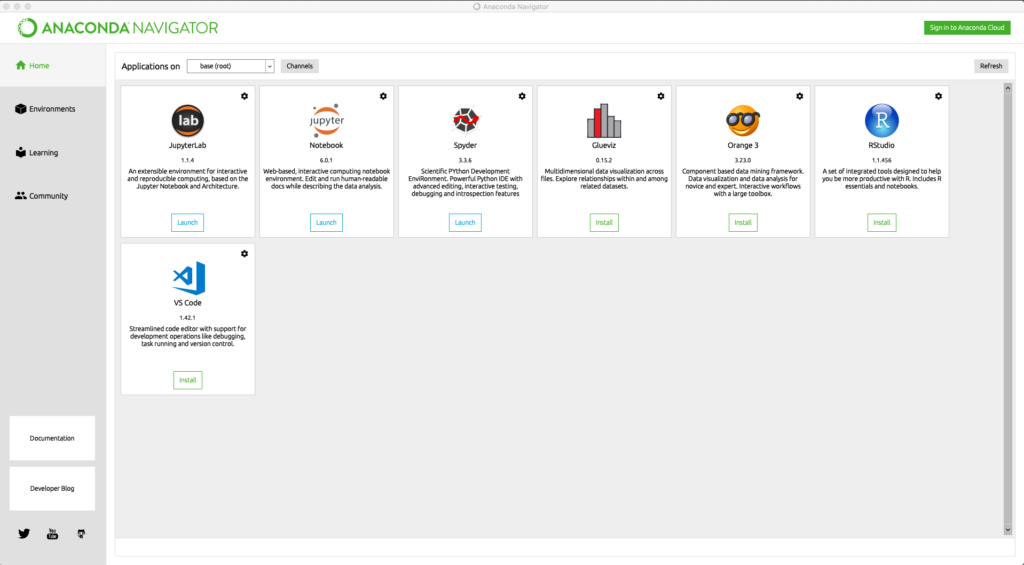
Start the program and open Jupyter Notebook. This is the Python environment we will be working with.
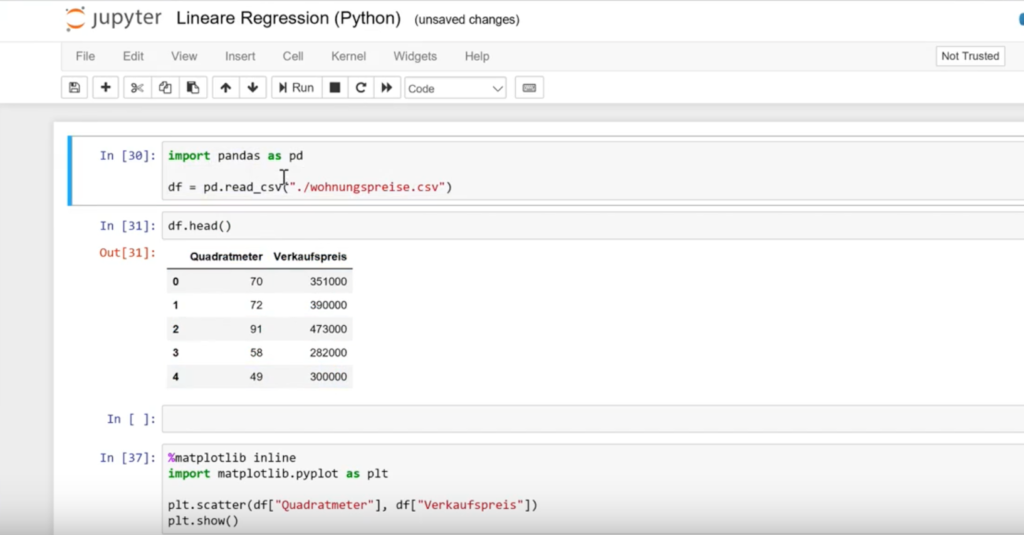
It may take a few seconds, but a browser opens and you can see your documents there. For example, you can open a file. This is a so-called Jupyter notebook and the most practical thing about it is that we can execute and evaluate a code there.
Crash course in our Jupyter enviroment
In this section we would like to get to know our Python environment.
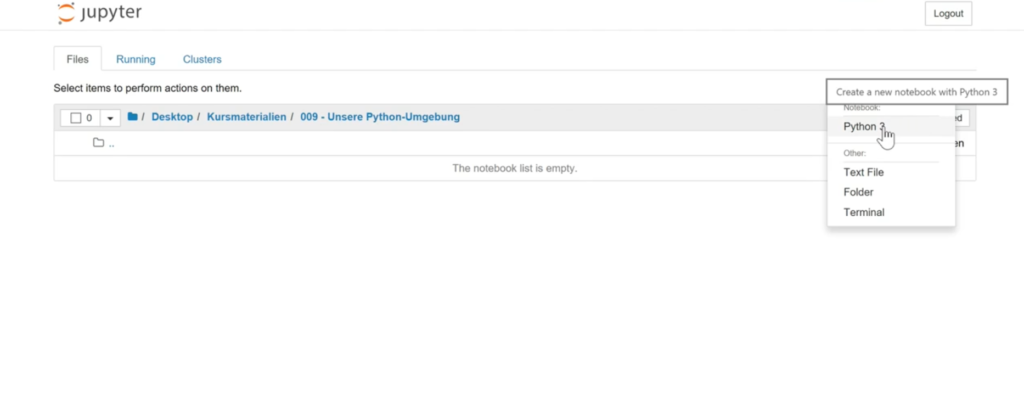
Important again, we call the whole thing via a browser, otherwise we cannot open this file. Then we navigate to a folder and there we can create a new file.
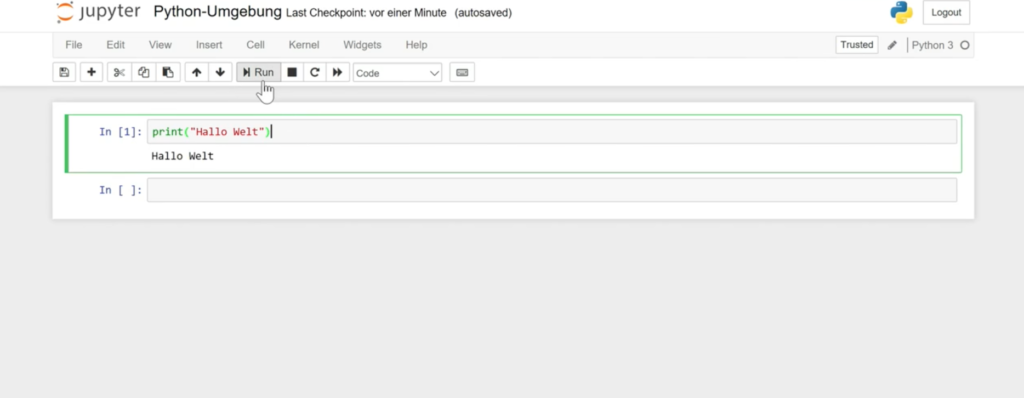
A new window opens in the browser. You can change the name above. You have the possibility to define any Python code and you can execute this cell directly by clicking on “Run”. The issue is directly underneath and is “Hello World”.
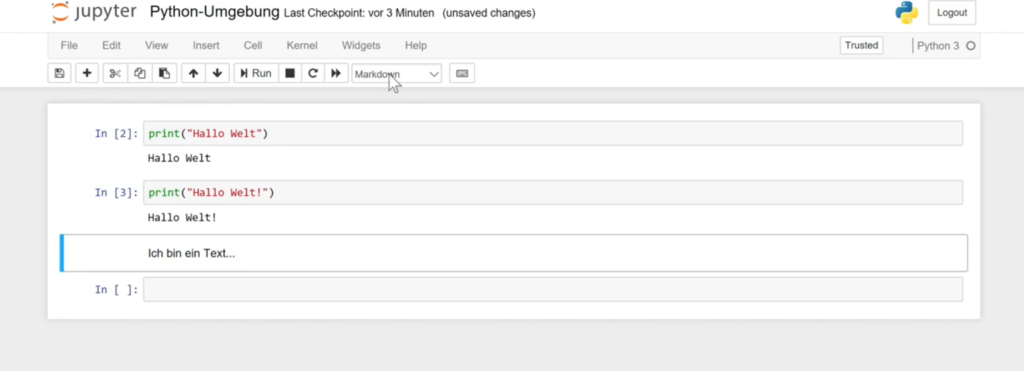
The practical thing is that such a Jupyter environment can consist of several lines.
We also have the option to add a comment, once with #, or we can say that our entire cell is simply a text block (Markdown).
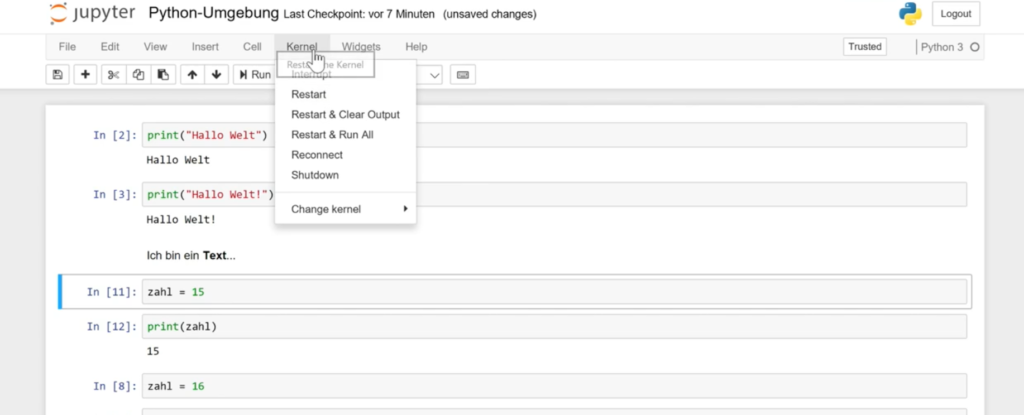
If you write programs that are about to crash or hang, you have the option to say that you would like to restart the so-called “Kernel” via Kernel and Restart. All variables are lost, but the program no longer hangs.
Next page