This is a step-by-step guide for beginners on how to set up the Mautic Twitter integration. With Mautic’s Twitter plugin, you’ll be able to use Mautic’s Social Monitoring features to build your contact lists based on Twitter hashtags.
Step-by-step: setting up the Mautic Twitter integration
- Create your Twitter app
To get started, you’ll need to create your own Twitter app that can connect to Mautic. Make sure you’re signed in to Twitter, then go to https://apps.twitter.com/. Click the “Create New App” button, and fill in the app name, description, and website. Don’t create your application quite yet. - Get your callback URL from Mautic
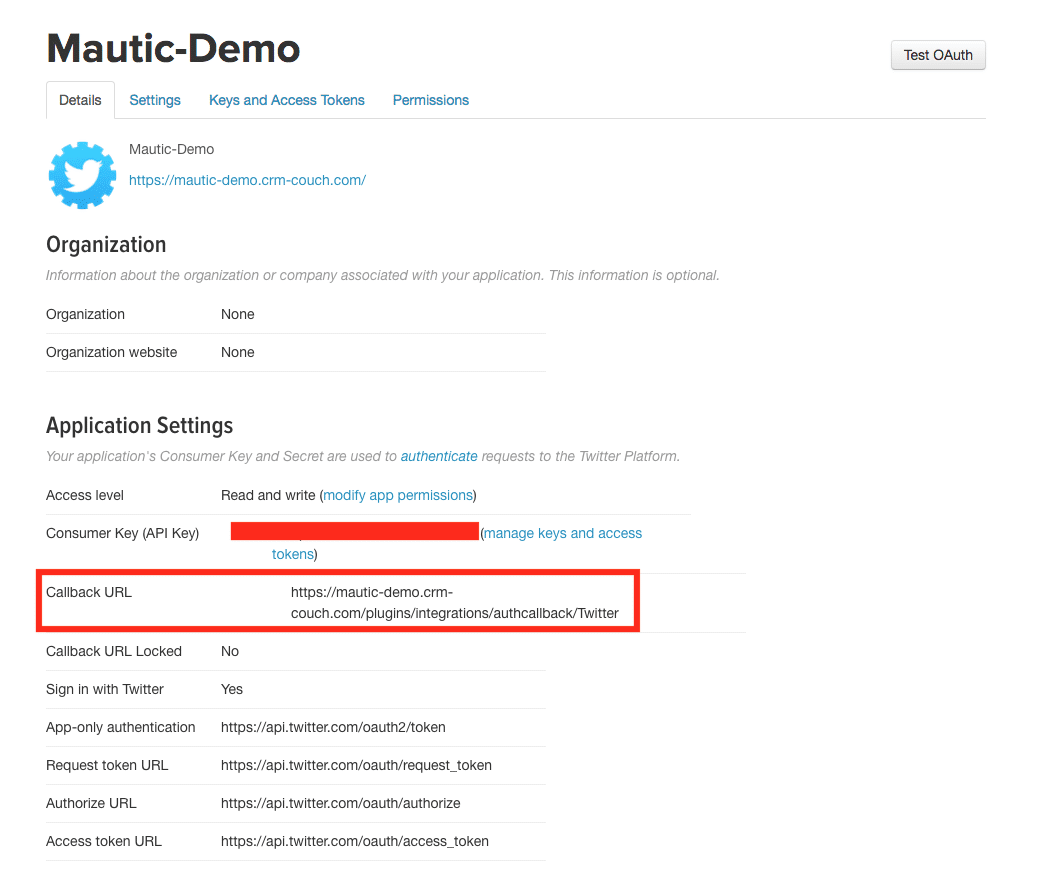
From your Mautic dashboard, click the settings (gear) icon in the top right, and then click on Plugins. Click on the Twitter plugin icon. In the box that pops up, copy the callback URL. - Finish creating your Twitter app
Switch back to creating your Twitter app, and paste the callback URL into the appropriate field. Click “Create your Twitter application” to create your app.  Get your Twitter API key and secret
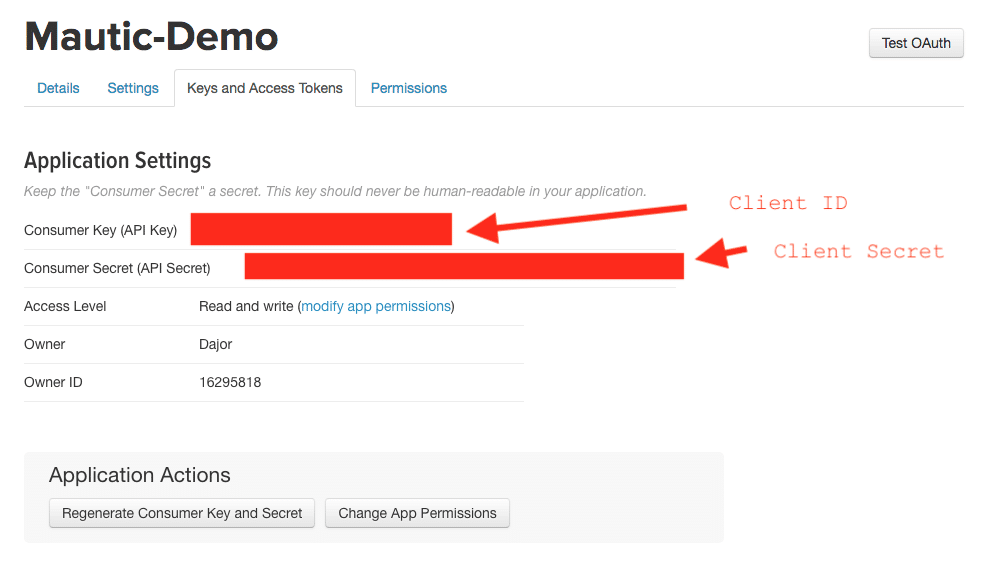
Now that you’ve created the app, click on the “Keys and Access Tokens” tab. Copy the Consumer Key and Consumer Secret and paste them into your plugin settings in Mautic. Complete the integration
To complete the integration, click “Authorize App”. A popup will appear, asking you to authorize the connection to Twitter. Allow it to authorize, and you’re done! Don’t forget to set the integration’s Published setting in Mautic to Yes. Take a look at the Features and Contact Mapping options!- Don’t forget the social monitoring cron job
With the connection between Twitter and Mautic in place, the final step is to make sure you have the social monitoring cron job running. php /var/www/mautic/app/console mautic:social:monitoring in our case every 7. Minute we run this cronjob
Now we active in Sugar the Plugin

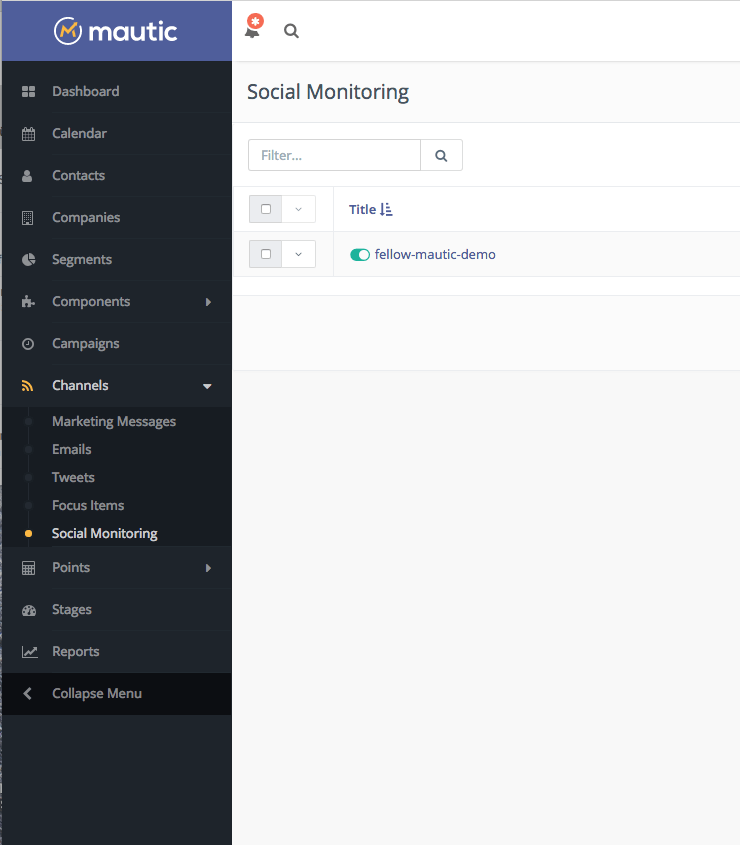
Create a Social Channel
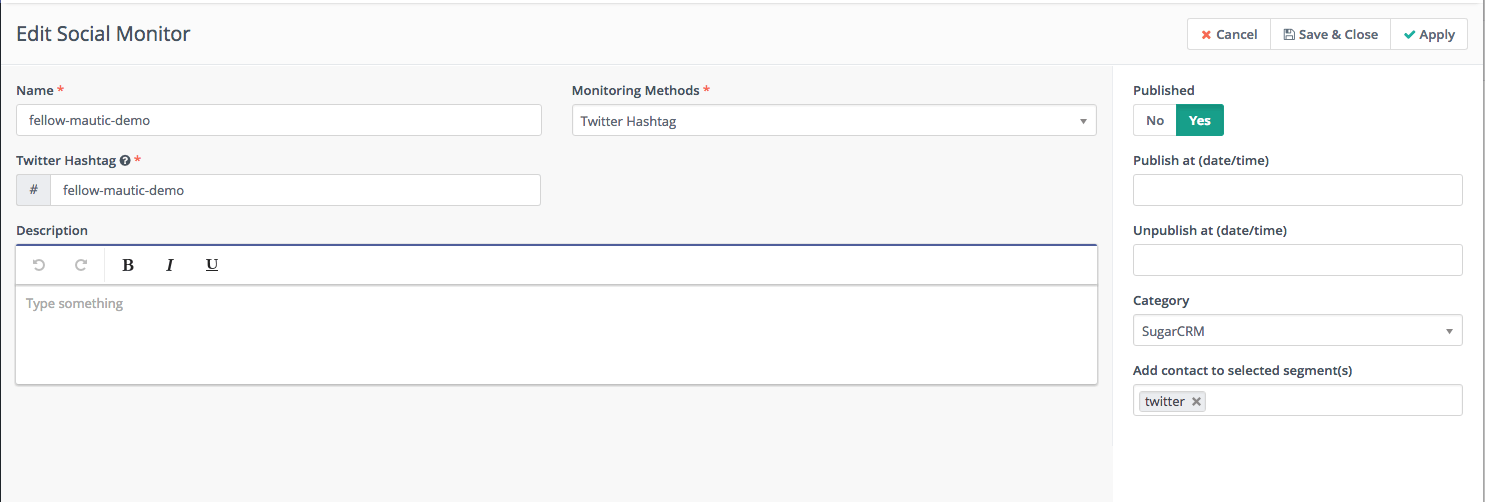
Define the Hashtag
Write some tweets
